from PIL import Image  # Import the Image module from the Pillow library

img = Image.open("photo.jpg")  # Load photo.jpg from disk into an Image object (original is untouched in memory)

# --- RESIZE ---
resized = img.resize((800, 600))  # Create a new Image object scaled to 800x600px (non-destructive, img is unchanged)
resized.save("resized.jpg")  # Write the resized image to disk as resized.jpg

# --- CROP ---
cropped = img.crop((100, 100, 500, 400))  # Cut a rectangle from img: starts at (100,100), ends at (500,400) → gives a 400x300px image
cropped.save("cropped.jpg")  # Write the cropped image to disk as cropped.jpg

# --- ROTATE ---
rotated = img.rotate(45)  # Create a new Image rotated 45° counter-clockwise; corners are clipped and filled black (canvas size unchanged)
rotated.save("rotated.jpg")  # Write the rotated image to disk as rotated.jpg
「photo.jpg」をコンピュータ上にある任意の画像へのパスに置き換えるだけです。
著者
アル・スワイガート
ジャンル
プログラミング
タイトル
Python で退屈な作業を自動化する
Al Sweigart 著『Automate the Boring Stuff with Python』は、実際のタスクの自動化に Python を使用するための初心者向けのガイドです。ファイル名の変更、Web サイトのスクレイピング、フォームへの記入、電子メールの送信、スプレッドシートの操作などの繰り返し作業を処理するスクリプトの作成方法を学びます。
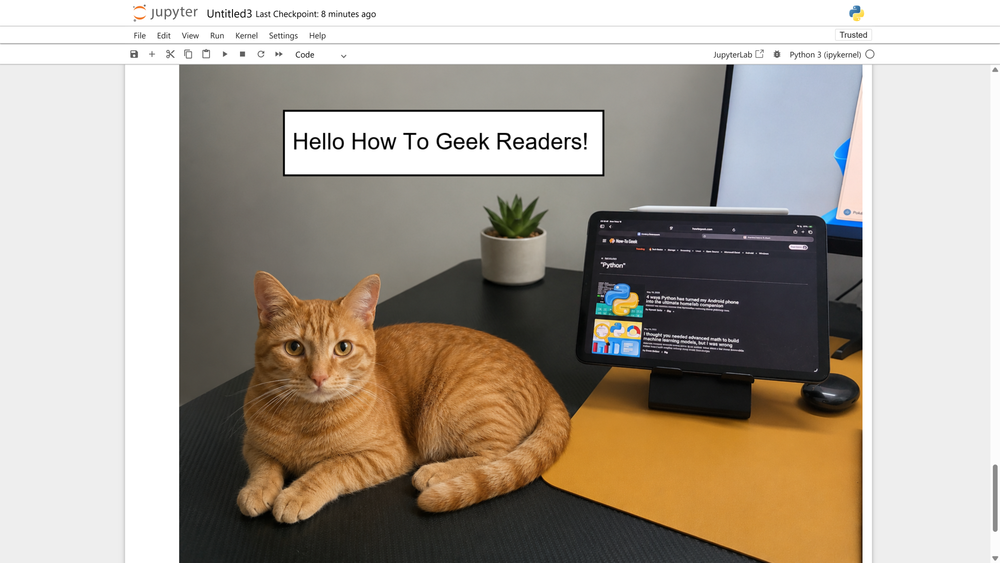
from PIL import Image, ImageDraw, ImageFont  # Also import ImageFont to load a proper font

img = Image.open("photo.jpg")
draw = ImageDraw.Draw(img)  # Draw object bound directly to img — modifications are in-place

# Draw a red rectangle
draw.rectangle((50, 50, 300, 150), outline="red", width=3)  # Rectangle from (50,50) to (300,150), red border, 3px thick

# Load a proper font (change path/size to suit your needs)
font = ImageFont.truetype("arial.ttf", size=32)  # Load a TTF font at 32px — use any .ttf file available on your system

# Add white text at position (60, 60)
draw.text((60, 60), "Hello, World!", fill="white", font=font)  # Write text using the loaded font

img.save("annotated.jpg")
from PIL import Image # Import Pillow's Image module for loading and saving images
import numpy as np # Import NumPy — allows treating the image as a grid of numbers for direct pixel math
img = Image.open("photo.jpg") # Load photo.jpg from disk into an Image object
pixels = np.array(img) # Convert the Image object into a NumPy array — each pixel becomes a number (0–255) representing its brightness/color value
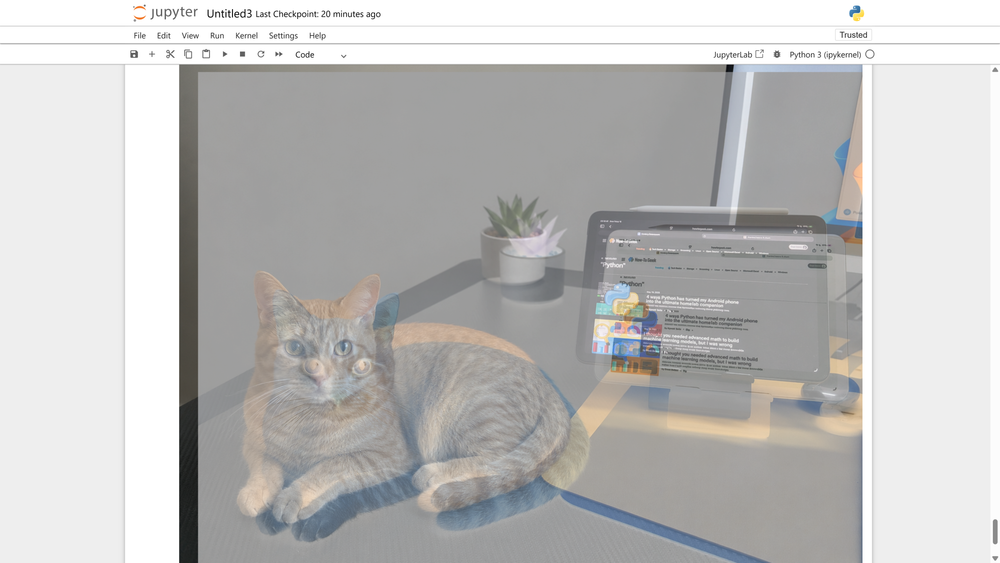
# --- INVERT ---
inverted = 255 - pixels # Subtract every pixel value from 255 — this flips the colors (0 becomes 255, 255 becomes 0, etc.)
result = Image.fromarray(inverted.astype(np.uint8)) # Convert the NumPy array back into a Pillow Image object — astype(np.uint8) ensures values stay in the valid 0–255 range
result.save("inverted.jpg") # Write the inverted image to disk
from PIL import Image, ImageFilter, ImageEnhance  # Import Image for loading, ImageFilter for blur/sharpen effects, ImageEnhance for brightness/contrast adjustments

img = Image.open("photo.jpg")  # Load photo.jpg from disk into an Image object (original stays unchanged throughout)

# --- GRAYSCALE ---
gray = img.convert("L")  # Convert img to grayscale — "L" is Pillow's mode for 8-bit black & white; returns a new Image object
gray.save("grayscale.jpg")  # Write the grayscale image to disk

# --- BLUR ---
blurred = img.filter(ImageFilter.BLUR)  # Apply a simple box blur to img — returns a new Image object, img is unchanged
blurred.save("blurred.jpg")  # Write the blurred image to disk

# --- SHARPEN ---
sharpened = img.filter(ImageFilter.SHARPEN)  # Apply a sharpening filter to img — enhances edges; returns a new Image object
sharpened.save("sharpened.jpg")  # Write the sharpened image to disk

# --- BRIGHTNESS ---
enhancer = ImageEnhance.Brightness(img)  # Create a Brightness enhancer object bound to img — similar to ImageDraw, but read-only (non-destructive)
bright = enhancer.enhance(1.5)  # Apply 1.5x brightness (1.0 = original, <1.0 = darker, >1.0 = brighter) — returns a new Image object
bright.save("brighter.jpg")  # Write the brightened image to disk
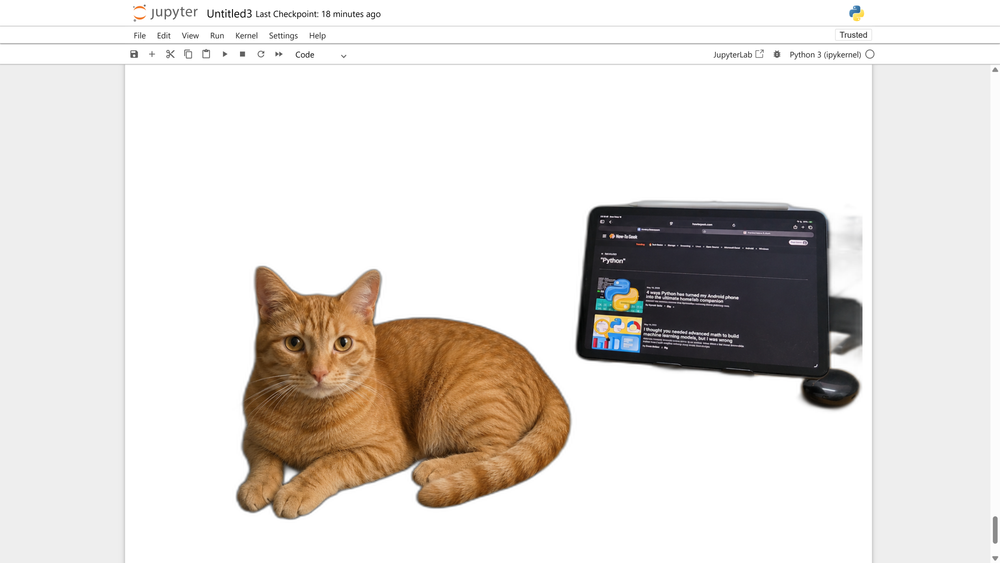
from rembg import remove  # Import the remove function from rembg — a third-party library that uses an AI model (U2Net) to detect and remove image backgrounds
from PIL import Image  # Import Pillow's Image module for loading and saving images

input_image = Image.open("photo.jpg")  # Load photo.jpg from disk into an Image object

output_image = remove(input_image)  # Pass the image through the AI model — detects the foreground subject, removes the background, returns a new Image object with a transparent background
output_image.save("no_background.png")  # Save as PNG — must use PNG (not JPG) because JPG doesn't support transparency; the transparent areas would be lost
from PIL import Image

background = Image.open("photo.jpg").convert("RGBA")  # Convert to RGBA to support transparency
overlay = Image.open("logo.png").convert("RGBA")  # Convert to RGBA — logos often have transparent areas

# Resize overlay to desired size before pasting
overlay = overlay.resize((200, 100))  # Scale the logo to 200x100px — adjust to suit your needs

# Paste the overlay at position (50, 50)
background.paste(overlay, (50, 50), mask=overlay)  # mask=overlay uses the overlay's alpha channel to blend edges cleanly — without this, transparent areas paste as black

background.save("composited.png")  # Save as PNG to preserve transparency
from PIL import Image

img = Image.open("photo.jpg").convert("RGBA")  # Load image and convert to RGBA — needed for consistent pixel handling across frames

frames = ()  # Empty list to store each frame of the animation

for i in range(20):  # Loop 20 times — each iteration generates one frame of the zoom effect
    scale = 1 + i * 0.02  # Calculate scale factor for this frame — starts at 1.0 (100%), increases by 2% each frame up to 1.38 (138%)
    new_width = int(img.width * scale)  # Calculate new width based on scale factor
    new_height = int(img.height * scale)  # Calculate new height based on scale factor
    resized = img.resize((new_width, new_height))  # Resize the image to the new dimensions — makes it slightly larger each frame

    # --- CROP BACK TO ORIGINAL SIZE FROM CENTER ---
    left = (resized.width - img.width) // 2  # Calculate how many pixels to trim from the left to center the crop
    top = (resized.height - img.height) // 2  # Calculate how many pixels to trim from the top to center the crop
    frame = resized.crop((left, top, left + img.width, top + img.height))  # Crop the resized image back to the original dimensions from the center — this creates the zoom-in illusion
    frames.append(frame)  # Add the cropped frame to the frames list

# --- SAVE AS GIF ---
frames(0).save(
    "zoom.gif",           # Output filename
    save_all=True,        # Tell Pillow to save all frames, not just the first one
    append_images=frames(1:),  # Attach frames 2–20 after the first frame
    duration=50,          # Each frame displays for 50 milliseconds — lower = faster animation
    loop=0                # 0 = loop forever; set to 1 for play-once, 2 for twice, etc.
)